> ## Documentation Index
> Fetch the complete documentation index at: https://specterops-bp-2641-crowdstrike-integration.mintlify.site/llms.txt
> Use this file to discover all available pages before exploring further.
# Use Falcon for IT with BloodHound Enterprise
> Learn how to run the CrowdStrike Falcon for IT workflow, review telemetry, and verify ingestion in BloodHound Enterprise.
 After you complete the [installation and configuration](/integrations/crowdstrike/falcon-for-it/configure), the CrowdStrike Foundry workflow can retrieve endpoint telemetry from Falcon Next-Gen SIEM, transform it to the BloodHound Enterprise schema, and upload it to your BloodHound Enterprise tenant.
This page shows you how to run the workflow, review the available dashboard views, and verify a successful upload.
The integration uses Foundry Functions and Falcon Fusion to automate BloodHound Enterprise data collection and ingestion.
| Workflow stage | Description |
| ------------------------- | -------------------------------------------------------------------------------- |
| **Fetch telemetry** | Retrieves new endpoint telemetry from Falcon Next-Gen SIEM |
| **Transform data** | Converts the collected data to the BloodHound Enterprise schema before upload |
| **Track host coverage** | Uses a Daily Status Table to track which hosts reported during the current cycle |
| **Retry incomplete work** | Reconciles incomplete collection runs to improve host coverage |
## Run the workflow manually
The workflow runs automatically on an hourly schedule, but you can also run it manually after installation and configuration to confirm that data reaches BloodHound Enterprise successfully.
1. Log in to CrowdStrike Falcon.
2. Go to **Fusion SOAR** > **Workflows**.
After you complete the [installation and configuration](/integrations/crowdstrike/falcon-for-it/configure), the CrowdStrike Foundry workflow can retrieve endpoint telemetry from Falcon Next-Gen SIEM, transform it to the BloodHound Enterprise schema, and upload it to your BloodHound Enterprise tenant.
This page shows you how to run the workflow, review the available dashboard views, and verify a successful upload.
The integration uses Foundry Functions and Falcon Fusion to automate BloodHound Enterprise data collection and ingestion.
| Workflow stage | Description |
| ------------------------- | -------------------------------------------------------------------------------- |
| **Fetch telemetry** | Retrieves new endpoint telemetry from Falcon Next-Gen SIEM |
| **Transform data** | Converts the collected data to the BloodHound Enterprise schema before upload |
| **Track host coverage** | Uses a Daily Status Table to track which hosts reported during the current cycle |
| **Retry incomplete work** | Reconciles incomplete collection runs to improve host coverage |
## Run the workflow manually
The workflow runs automatically on an hourly schedule, but you can also run it manually after installation and configuration to confirm that data reaches BloodHound Enterprise successfully.
1. Log in to CrowdStrike Falcon.
2. Go to **Fusion SOAR** > **Workflows**.
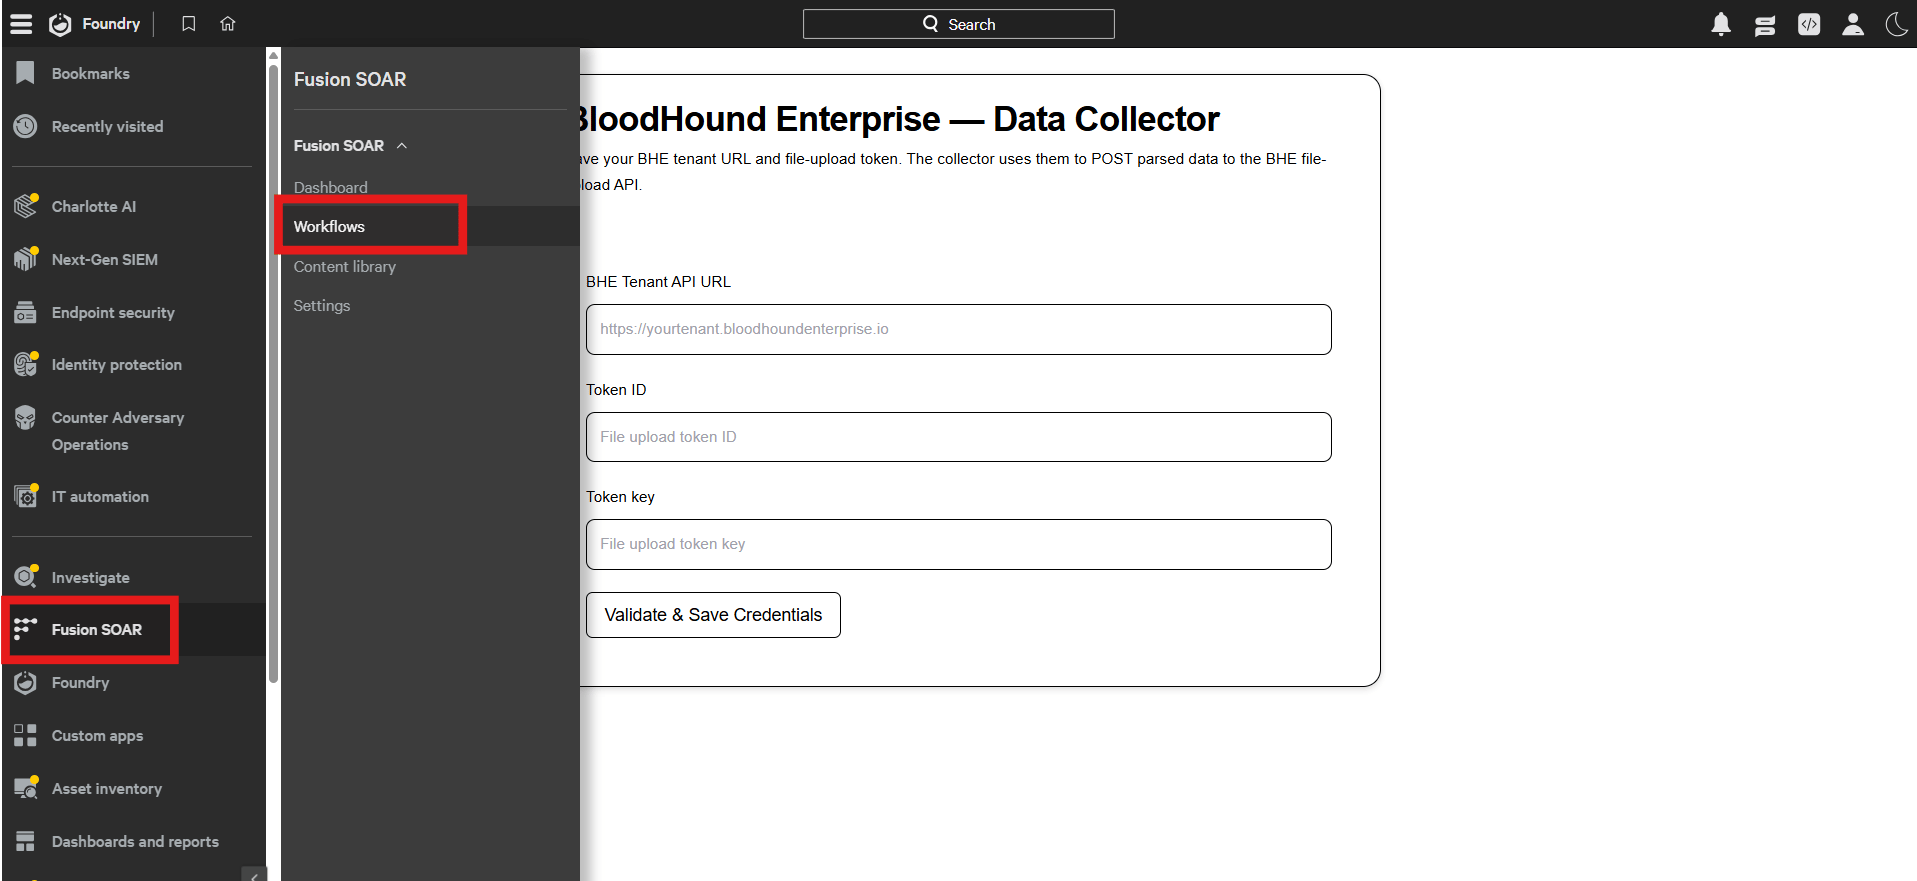 3. Locate the **BloodHound Enterprise NG SIEM Workflow**.
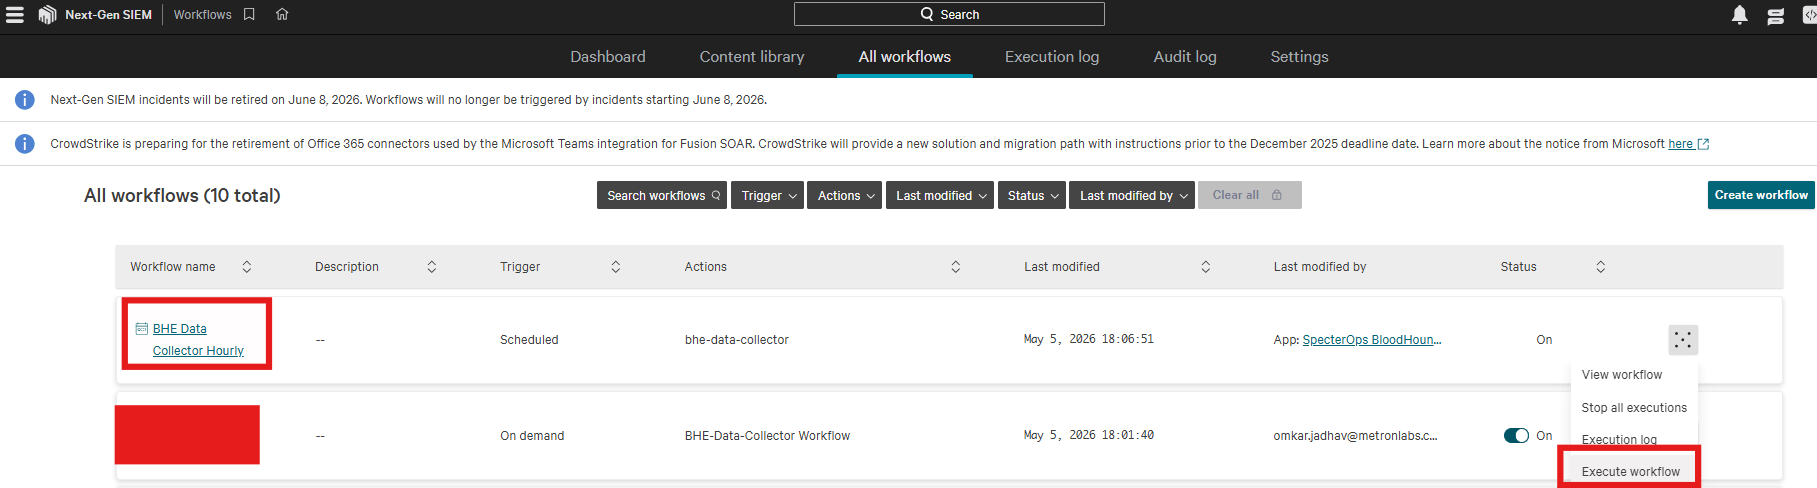
1. Open the workflow action menu and click **Execute Workflow**.
3. Locate the **BloodHound Enterprise NG SIEM Workflow**.
1. Open the workflow action menu and click **Execute Workflow**.
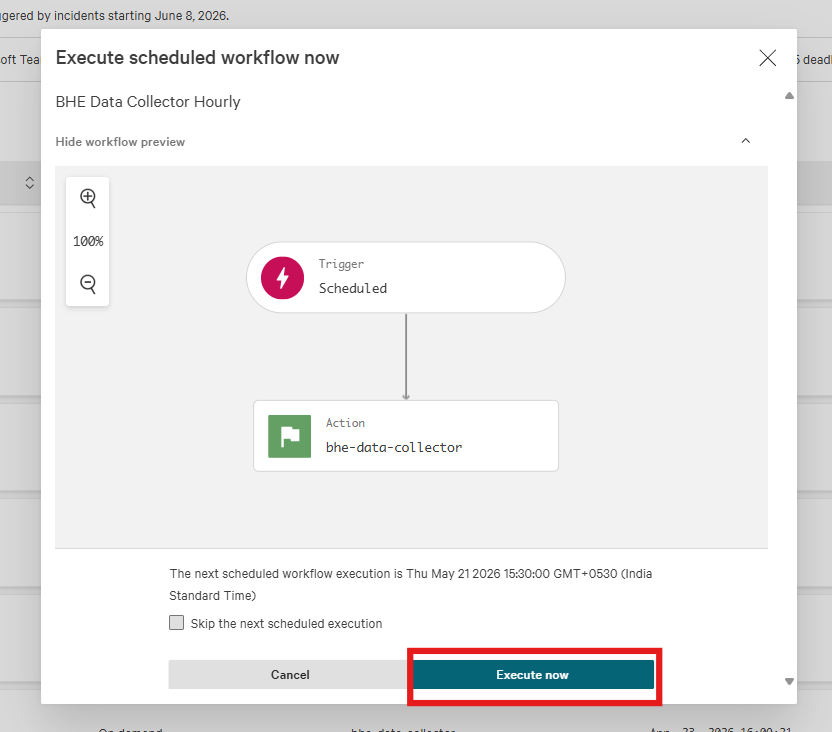
 2. In the confirmation dialog, click **Execute now**.
 1. When CrowdStrike displays the workflow execution notification, click **View**.
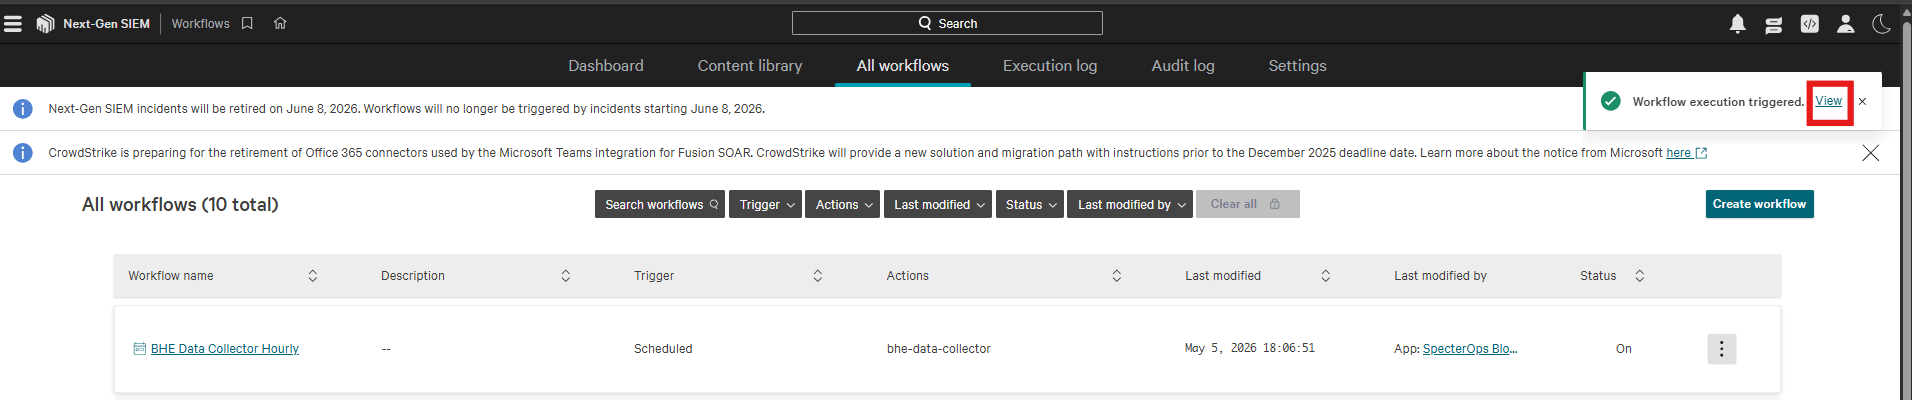 2. Review the real-time execution results for the run.
Record the reported job ID. You can use it to verify data ingestion in BloodHound Enterprise.
## Review the dashboard
The CrowdStrike dashboard provides visibility into the data that the integration collects and uploads to BloodHound Enterprise.
To navigate to the dashboard in CrowdStrike Falcon, go to **Next-Gen SIEM** > **Dashboard**.
The dashboard displays the following visualizations to monitor host activity and data ingestion:
| Visualization | Description |
| ---------------------------------------------- | ------------------------------------------------------------------------------------------------------------------------- |
| **Event Count - Data Types** | Displays a single-value metric highlighting the volume of specific BloodHound data types filtered by recent detection IDs |
| **Top Active Hosts** | Displays a bar chart of the top five hostnames that generated the most OS query events during the selected time range |
| **Active Interactive Logon Sessions Tracking** | Displays a pie chart of interactive user logon sessions grouped by hostname and logon domain |
| **Job Execution Audit Trail** | Displays a table of upload events, including job IDs, processed event counts, and upload status |
The dashboard includes a global time filter that lets you adjust the reporting range across all visualizations.
## Verify upload events
The application writes an audit event to Falcon Next-Gen SIEM after it uploads data successfully to BloodHound Enterprise.
After the workflow completes successfully, confirm the upload in both Falcon Next-Gen SIEM and BloodHound Enterprise.
1. Log in to CrowdStrike Falcon.
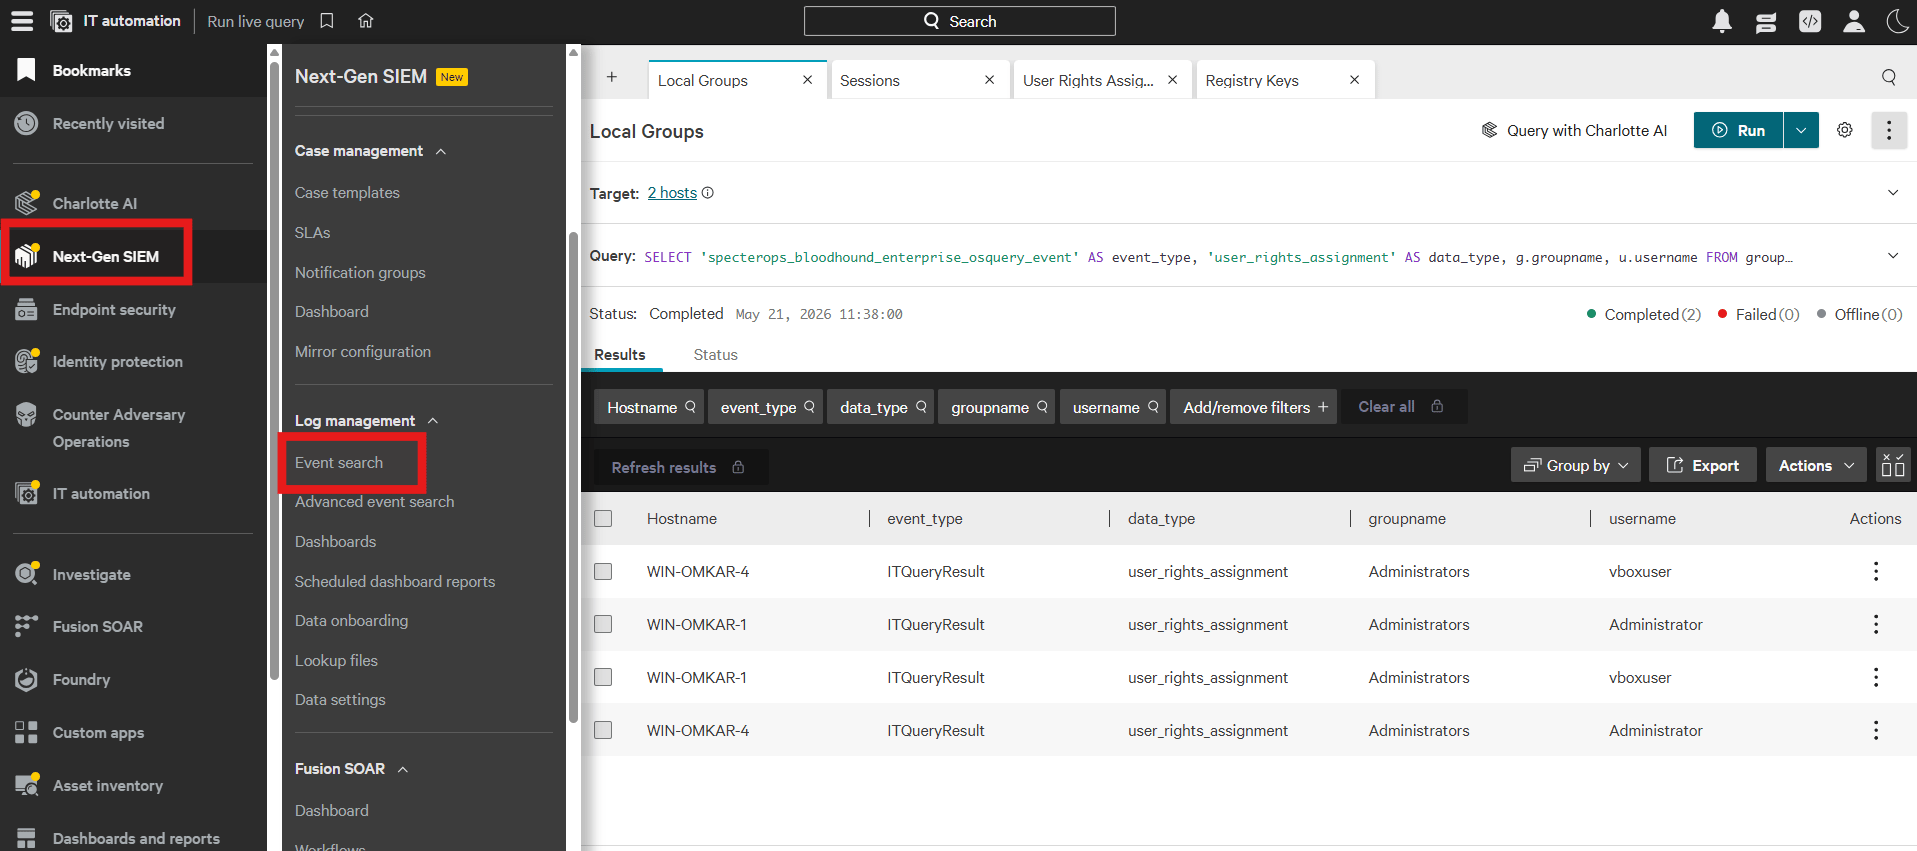
2. Go to **Next-Gen SIEM** > **Log management** > **Event Search**.
2. Review the real-time execution results for the run.
Record the reported job ID. You can use it to verify data ingestion in BloodHound Enterprise.
## Review the dashboard
The CrowdStrike dashboard provides visibility into the data that the integration collects and uploads to BloodHound Enterprise.
To navigate to the dashboard in CrowdStrike Falcon, go to **Next-Gen SIEM** > **Dashboard**.
The dashboard displays the following visualizations to monitor host activity and data ingestion:
| Visualization | Description |
| ---------------------------------------------- | ------------------------------------------------------------------------------------------------------------------------- |
| **Event Count - Data Types** | Displays a single-value metric highlighting the volume of specific BloodHound data types filtered by recent detection IDs |
| **Top Active Hosts** | Displays a bar chart of the top five hostnames that generated the most OS query events during the selected time range |
| **Active Interactive Logon Sessions Tracking** | Displays a pie chart of interactive user logon sessions grouped by hostname and logon domain |
| **Job Execution Audit Trail** | Displays a table of upload events, including job IDs, processed event counts, and upload status |
The dashboard includes a global time filter that lets you adjust the reporting range across all visualizations.
## Verify upload events
The application writes an audit event to Falcon Next-Gen SIEM after it uploads data successfully to BloodHound Enterprise.
After the workflow completes successfully, confirm the upload in both Falcon Next-Gen SIEM and BloodHound Enterprise.
1. Log in to CrowdStrike Falcon.
2. Go to **Next-Gen SIEM** > **Log management** > **Event Search**.
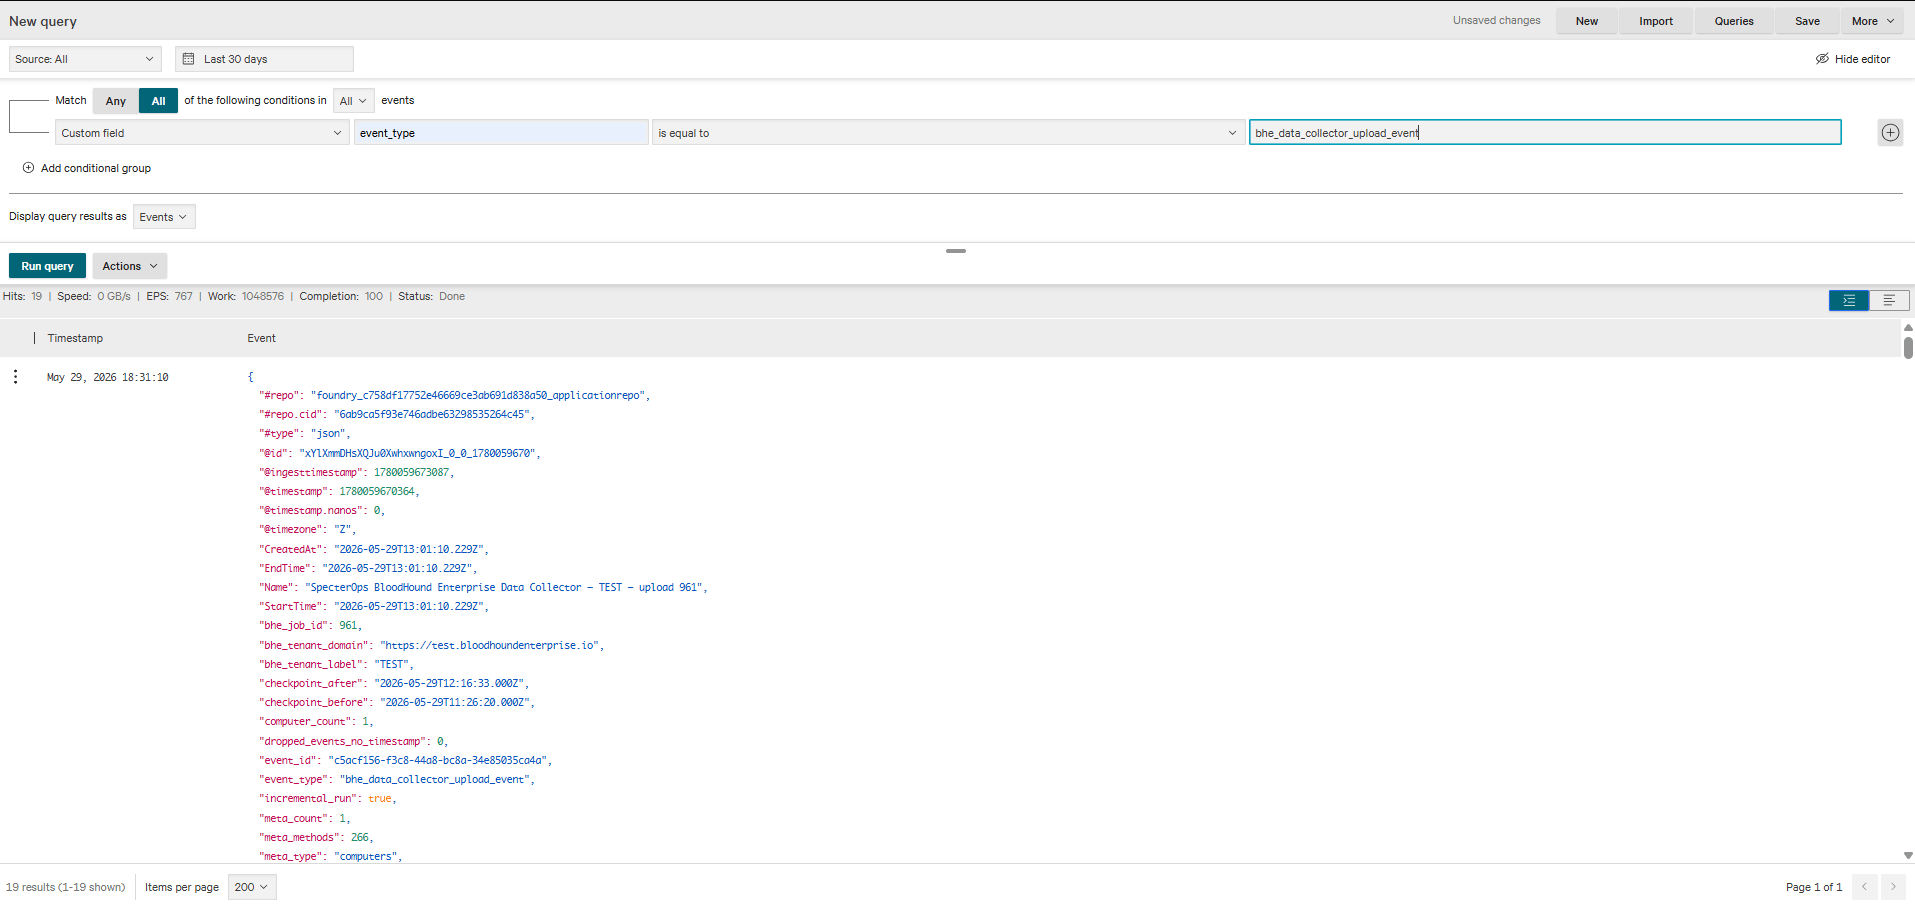
 Apply a custom filter with the following values:
| Field | Value |
| ------------ | --------------------------------------------- |
| **Field** | `event_type` |
| **Operator** | `is equal to` |
| **Value** | `bloodhound_enterprise_data_collector_upload` |
1. Confirm that a matching event appears for the workflow run.
2. Review the event details for the job ID, computer count, Next-Gen SIEM event counts, and checkpoint details.
3. Record the job ID to verify data ingestion in BloodHound Enterprise.
Apply a custom filter with the following values:
| Field | Value |
| ------------ | --------------------------------------------- |
| **Field** | `event_type` |
| **Operator** | `is equal to` |
| **Value** | `bloodhound_enterprise_data_collector_upload` |
1. Confirm that a matching event appears for the workflow run.
2. Review the event details for the job ID, computer count, Next-Gen SIEM event counts, and checkpoint details.
3. Record the job ID to verify data ingestion in BloodHound Enterprise.
 1. Log in to your BloodHound Enterprise tenant.
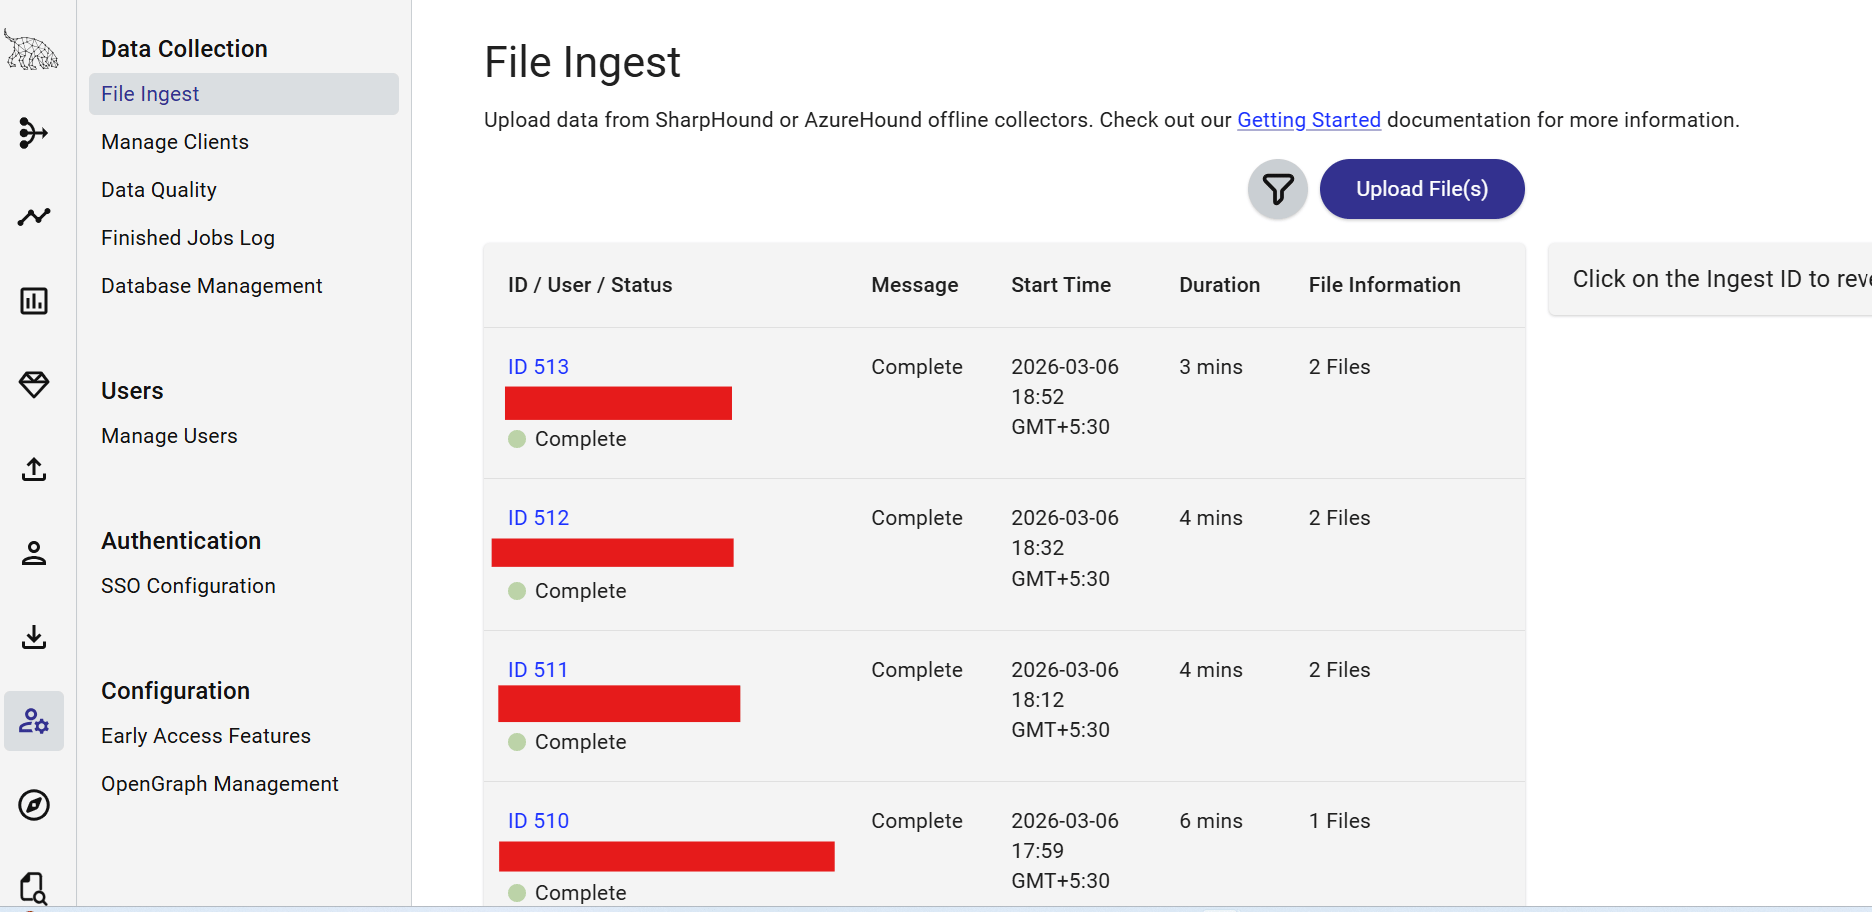
2. Go to **Administration** > **Data Collection** > **File Ingest**.
Locate the latest ingestion entry and verify it against the job ID from the Falcon Next-Gen SIEM audit event.
* Confirm that the upload start time matches the workflow execution time.
* Confirm that the status of the job is **Complete**.
1. Log in to your BloodHound Enterprise tenant.
2. Go to **Administration** > **Data Collection** > **File Ingest**.
Locate the latest ingestion entry and verify it against the job ID from the Falcon Next-Gen SIEM audit event.
* Confirm that the upload start time matches the workflow execution time.
* Confirm that the status of the job is **Complete**.